
User runbook
For everyone who is not the company admin. Your company is already set up; this is how you join it, and how you create a risk assessment and export the report once you are in. Setting the company up is the Company runbook.
Your company must already be registered by its admin, and that admin will approve your account before you can sign in. If you are the person setting the company up, use the Company runbook instead — this guide is for everyone who joins afterwards.
| Step | Who | Once or repeated |
|---|---|---|
| 1. Join your company | You | Once |
| 2. Get approved | Your company admin | Once |
| 3. Sign in | You | Once |
| 4. Create a risk assessment | Editor or admin | Every job |
| 5. Export the report | Anyone | Every job |
Join your company
You do not need the company master email — you register by naming the company, on the screen titled User Onboarding.
- Open the platform, choose Click to Onboard, then the user tab
- Type the company nameExactly as registered. Capitalisation does not matter.
- Complete name, email and passwordThese appear once the company is confirmed.
- SubmitThe account is created as Pending, and you cannot sign in yet — that is the next step.
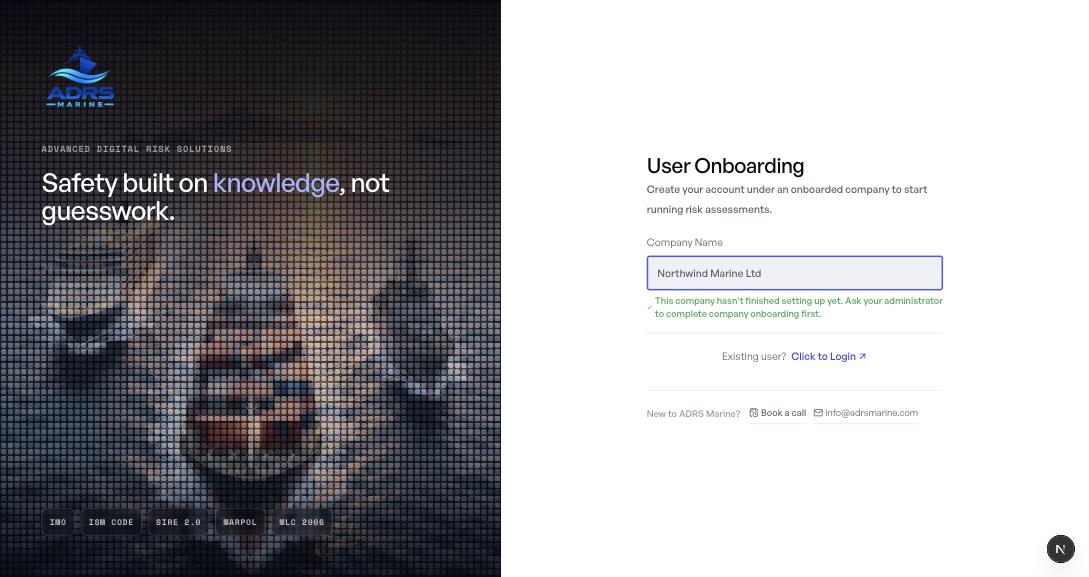
| If it says | Then |
|---|---|
| We couldn’t find that company | The name is not on the register. Check the exact spelling with your administrator. |
| This company hasn’t finished setting up yet | Your company is approved, but its admin has not finished company onboarding. They must complete the Company runbook first. |
| More than one company is registered under this name | Two organisations share the name. Contact ADRS Marine so the right one can be identified. |
Get approved
Registering does not let you in on its own. Your account is held as Pending until a company admin at your organisation approves it and sets your role. This is deliberate — nobody reaches your company’s assessments automatically.
If you are stuck at a Pending screen, nothing is wrong with your account — it is waiting on your company admin. Ask them to open User Management, approve you, and choose your role (Editor or Viewer). Once they do, you can sign in straight away.
Sign in
Once you are approved, use the User Login tab — not Company Login. The giveaway is the first field: User Login asks for your Email ID, the address you registered with; Company Login asks for a Master User ID, which belongs to the admin.
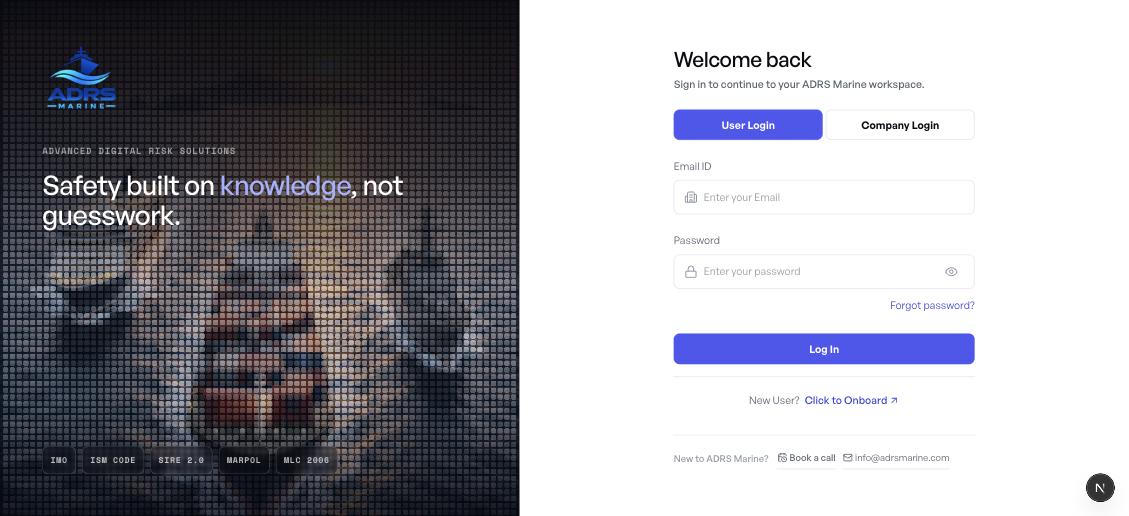
Forgot password? on the sign-in screen emails you a short-lived code and lets you set a new one. An administrator cannot set your password for you — see Getting access for the full reset.
Create a risk assessment
This is the everyday work, and it repeats for every job. You need the Editor role (or admin); a Viewer can read and export assessments but not write them.
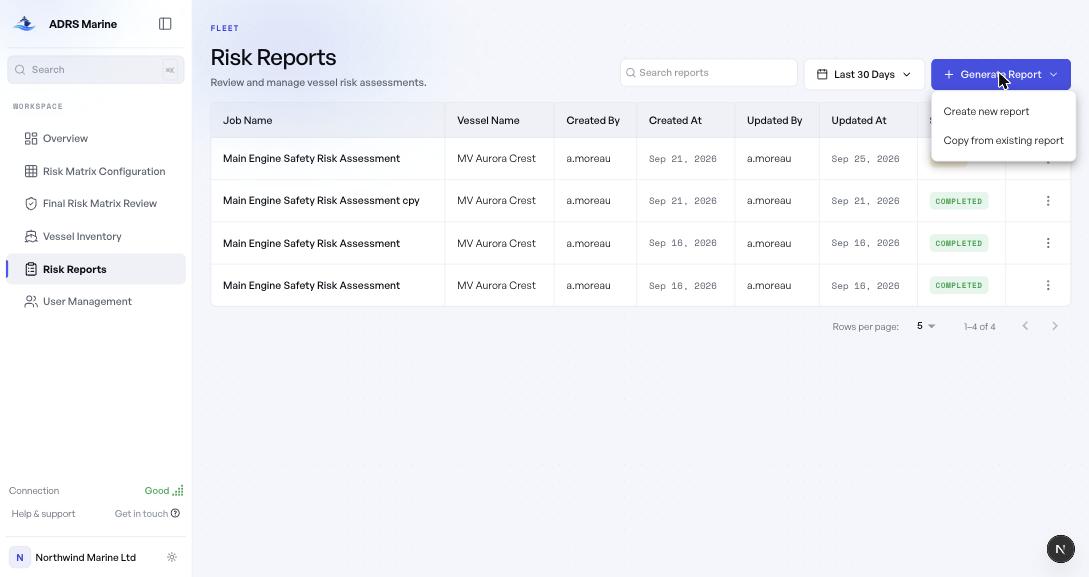
- Open Risk Reports and choose Generate ReportPick Create new report, or Copy from existing report to reuse the structure of a job you have already assessed.
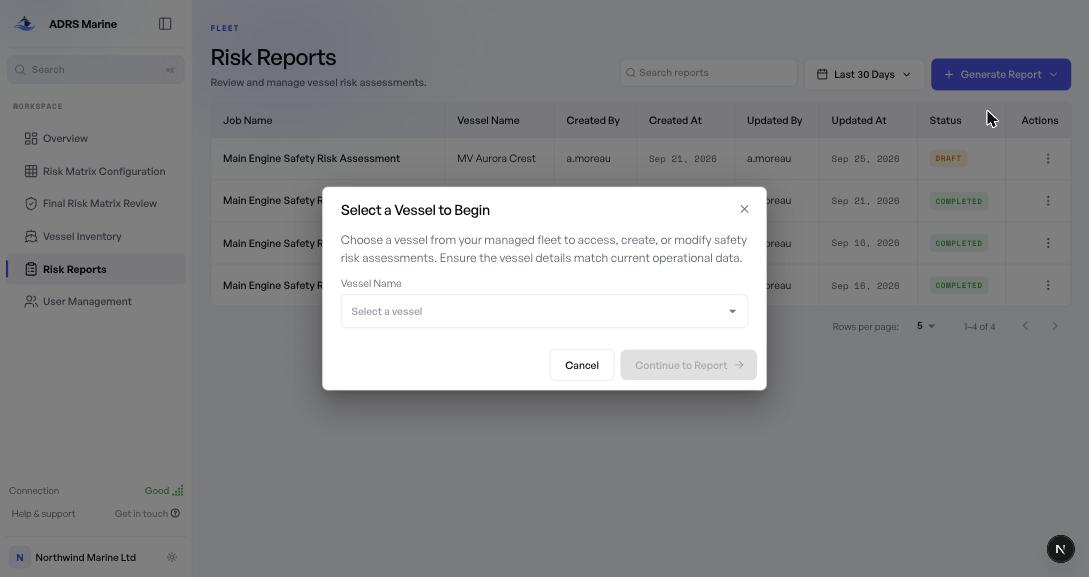
- Choose the vesselFrom your company’s fleet.
Step 1 of 4 — Define the job
Name the job and describe it. The description is what the suggestion engine reads, so a fuller description produces better suggestions.
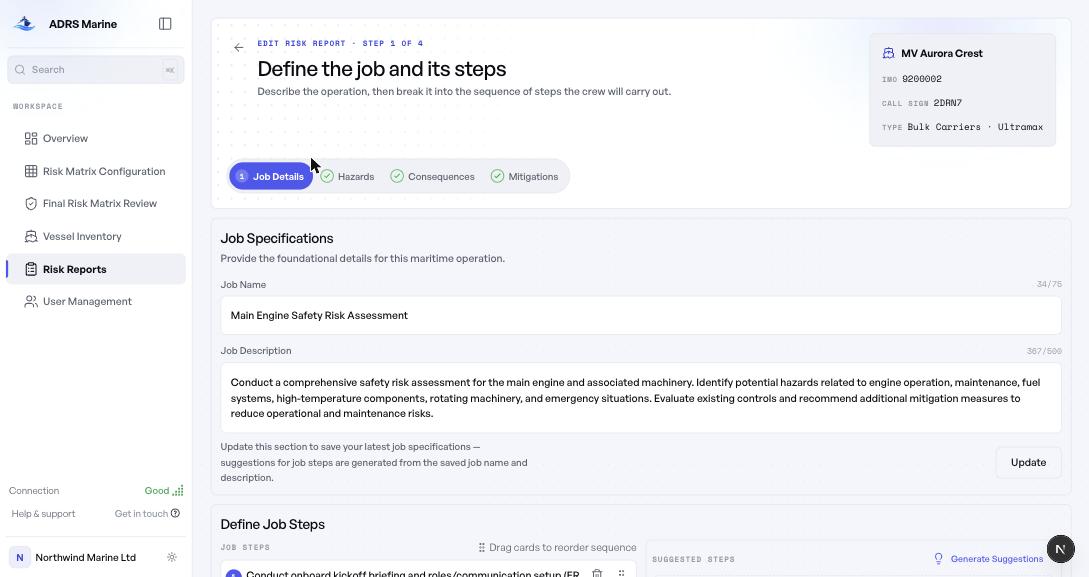
Then break the job into the sequence of steps the crew will carry out. Drag the cards to reorder them. Generate Suggestions proposes steps from the job name and description — click one to adopt it, and edit it afterwards.
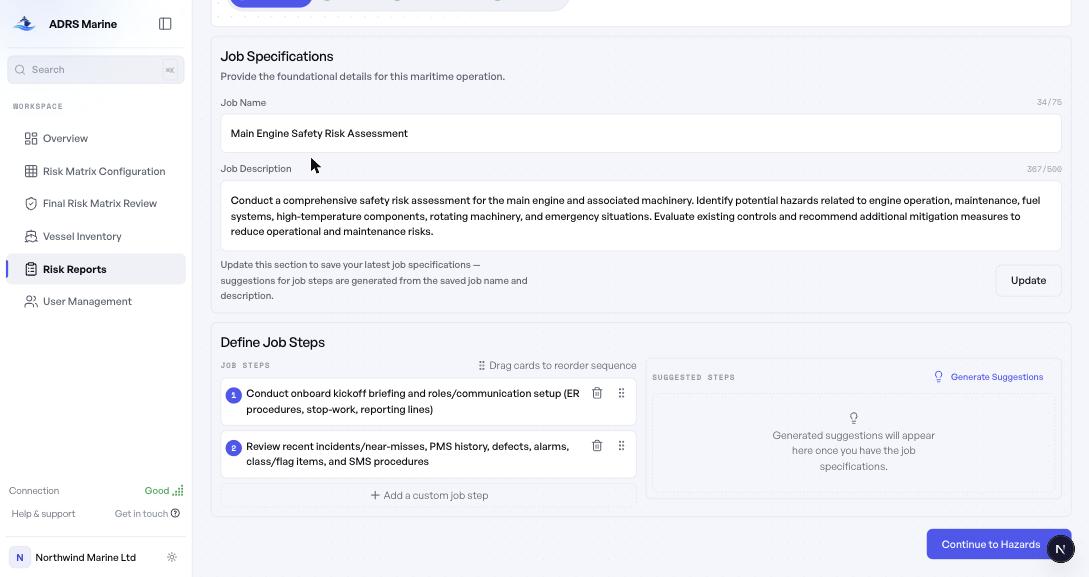
Step 2 of 4 — Identify hazards
For each job step, what could realistically go wrong before any controls are applied. Use the job step selector to move between steps. The panel on the right keeps a running count and the score reference in view.
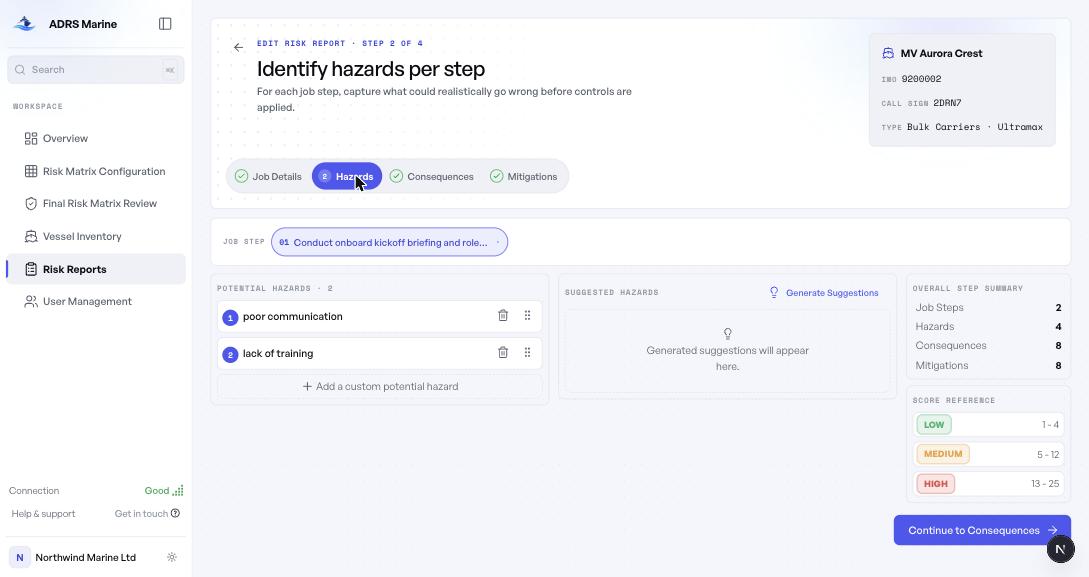
Step 3 of 4 — Score the consequences
For each hazard, the credible outcomes — and how bad each would be. Expand a consequence to score it: choose a severity and a likelihood, and the total is calculated and banded for you.
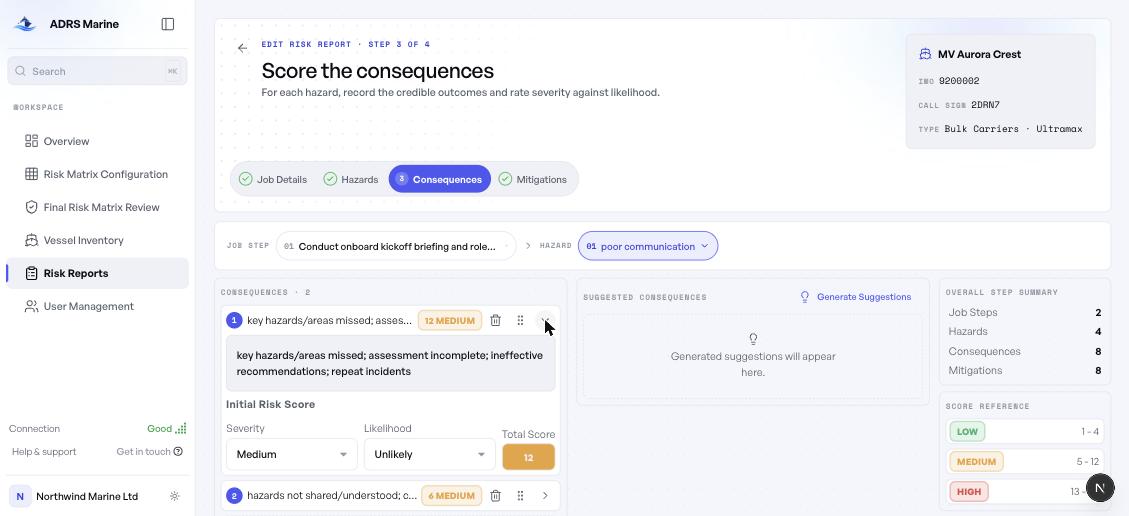
“Fire” is not a risk until you say what the fire does. That is why the score sits one level down.
Step 4 of 4 — Apply controls and re-score
For each consequence, record what you are doing about it, then score it again with those measures in place. The header shows the initial score and the new one side by side, so the difference the mitigation makes is visible as you work.
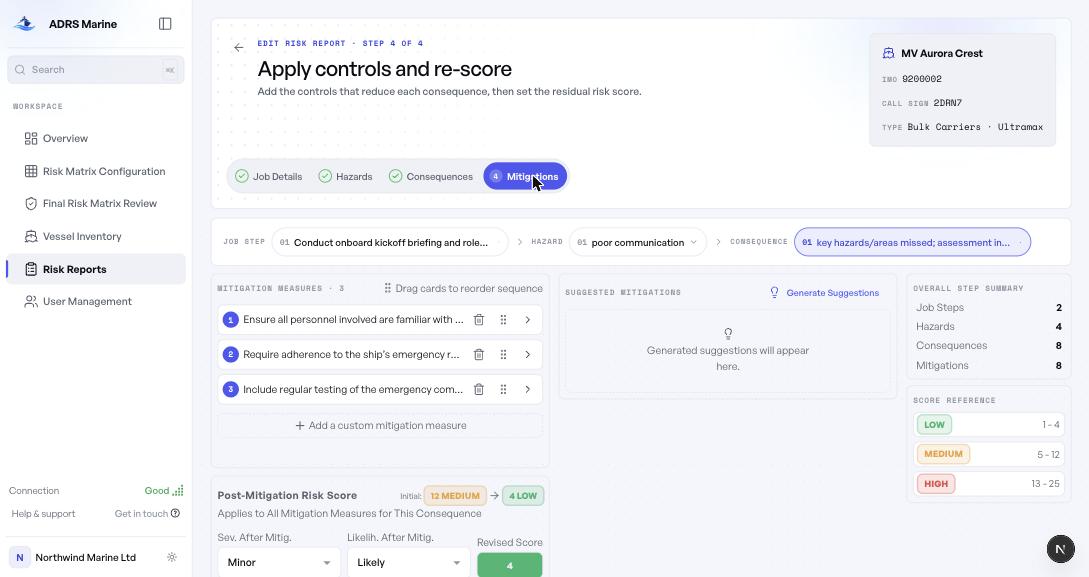
Assessments save a moment after you stop typing, and the header tells you the state. Closing the tab by accident does not cost you the session, and if the connection drops your changes are held until it returns.
An assessment stays a Draft until every consequence has a mitigation and both scores. Once it does, it becomes Completed.
Export the report
- Open the row menu on Risk Reports
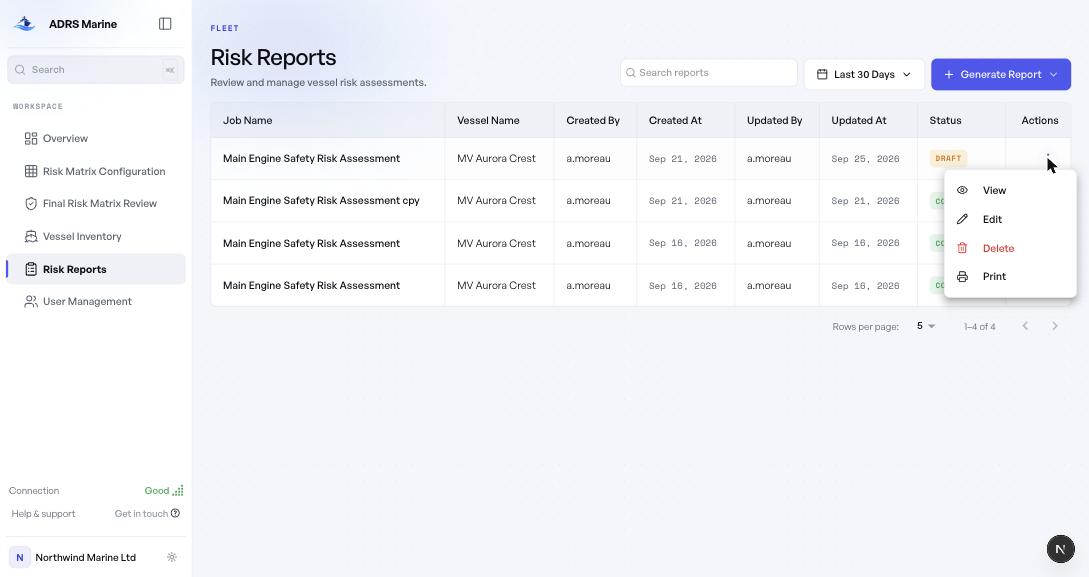
| Action | Does | Who |
|---|---|---|
| View | Opens the assessment read-only. | Everyone |
| Edit | Reopens the four-step wizard. | Admin, Editor |
| Delete | Removes it permanently. | Admin, Editor |
| Opens the print preview. | Everyone |
There is no archive and no restore, and the assessment’s scores leave the fleet totals with it. Read the job name in the confirmation before agreeing.
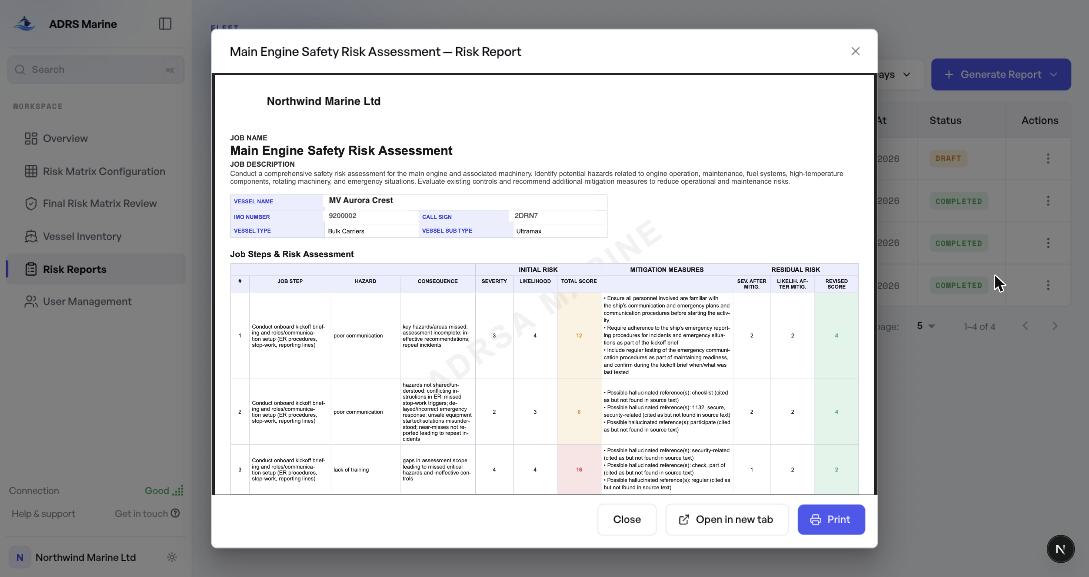
- Choose PrintThe preview shows exactly what will be printed: your company name and logo, the vessel’s identity, and every job step, hazard, consequence and mitigation with both scores side by side.
- Print, or open in a new tabPrint raises your browser’s print dialog. To keep a PDF, print and choose Save as PDF as the destination.
That is the loop
From here it is a new assessment and a new report for each job. The matrix, the fleet inventory and user management belong to your company admin — if you need a new vessel added or your role changed, that is a request to them, and the Company runbook is where their side is written.
If something does not behave as described, Troubleshooting covers the known issues and what to check first.